When it comes to finishing PLA prints and achieving a smooth surface, there are alternative methods available since acetone smoothing is not suitable for PLA. These methods can help you achieve a polished and shiny finish on your prints.
In this article, we will guide you through various techniques for smoothing PLA prints, starting with basic steps like trimming and sanding. We will then explore different approaches, such as applying coatings or even using heat to melt the surface and create a smooth finish.
If you prefer a hassle-free option and don’t have the time or resources to carry out the post-processing yourself, consider using Craftcloud by All3DP. With a wide range of finish options available, you can have your PLA parts professionally printed and finished according to your specifications.
Removal of excess material
When finishing your print, it’s important to remove any excess material, such as brim edges or supports. To accomplish this, you can utilize various tools specifically designed for the task.
Utility Knife
To begin with, let’s explore the process of trimming excess material using a craft knife, such as an X-Acto knife, which is commonly used in various DIY crafts.
When selecting a knife for cleaning up your 3D prints, it’s essential to consider the blade choice. The standard size 11 blade is generally versatile, but you may find other types better suited to your specific needs.
Before you start cutting, it’s important to review basic knife safety rules. Always cut away from yourself, avoid placing your fingers in front of the blade while holding the print, and use caution to prevent applying excessive force during cutting.
To remove supports or other excess material, position the blade along one of the print’s edges and gently move it across the surface. Be careful not to apply too much pressure, as this could inadvertently remove more material than intended and potentially damage the print. Repeat this process until all the edges are smooth.
Lastly, if you don’t have access to a utility knife, a single-edged razor blade can also be used effectively. However, exercise caution as safety should always be a priority. Remember, a smooth finish is not worth risking injury.
Rotary Multitool
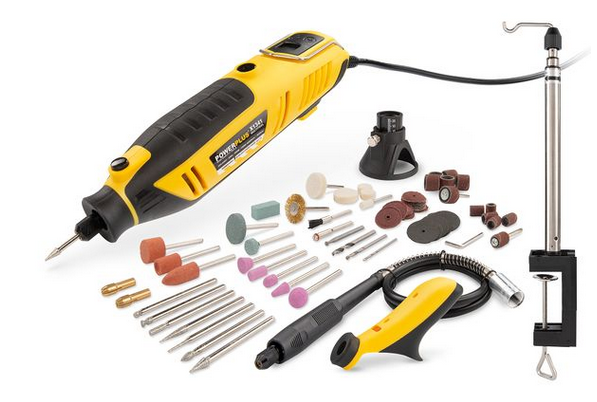
Another excellent option for finishing 3D prints is using rotary multitools like Dremels. These tools provide versatility, especially for reaching inside edges and other challenging areas on a part.
When using a rotary multitool, it’s important to keep two things in mind. First, remember that these tools are designed for speed, not torque. Instead of applying excessive pressure when you’re not achieving the desired results, increase the rotary speed. This not only saves you effort but also prolongs the lifespan of your tool.
Second, be cautious not to hover over one spot for too long or exert excessive pressure when working with a power tool on plastic. The movement of the tool generates heat, and prolonged exposure can melt the plastic, leading to unwanted divots and holes in the print.
While some rotary tools come with sanding attachments, they can be too aggressive for smoothing PLA. In the next section, we will explore effective sanding techniques.
Sanding
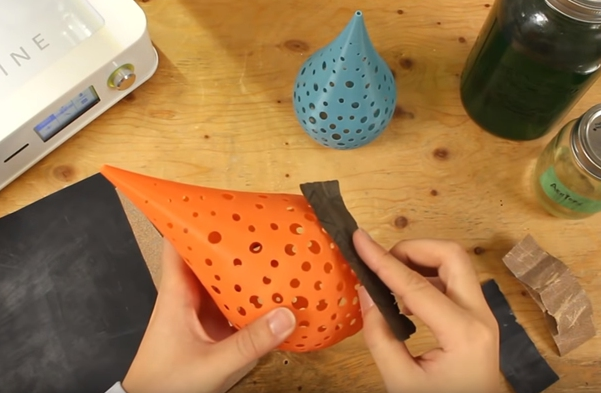
Sanding is a popular and accessible method for smoothing out 3D prints. There are various approaches to sanding, depending on the size and level of detail of your print.
For prints with large surface areas, using a sanding block can be beneficial. Sanding blocks help distribute pressure evenly, reducing strain on your hands and ensuring even wear on both the sandpaper and the print.
If you’re working on prints with intricate details, nail files can be a great option. There are different sizes and types of nail files available, and inexpensive cardboard files often work well for this purpose.
Using loose sheets of sandpaper is another option, which can be advantageous in certain situations. When sanding, it’s recommended to move the sandpaper in circular motions against the grain of the layer lines for optimal results.
Gradually increasing the grit of the sandpaper is important. Depending on the desired outcome, you may start with a lower grit, such as 400, and progress to higher grits like 4,000.
Wet sanding is a technique you may have heard of. High-grit wet sandpaper is typically used as a final sanding stage because it removes minimal material and leaves a polished finish. The technique for wet sanding is similar to regular sanding, except you wet the sandpaper periodically for smoother operation.
Surface Melting
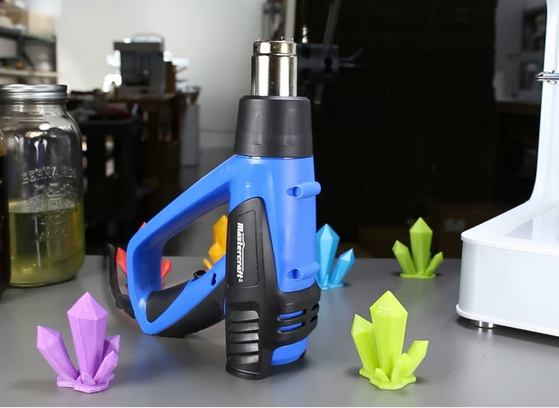
To harness the power of heat for finishing PLA prints, a commonly used tool is a heat gun. Set the heat gun to its lowest heat setting for optimal results. For even distribution of heat and consistent finishing, place the print on a turntable and rotate it slowly. This approach helps prevent specific areas from over-melting, resulting in an overall improved finish.
While a hairdryer might seem like a viable alternative to a heat gun, it is not designed to reach the high temperatures required to melt plastic effectively. Most hairdryer models do not even reach the glass transition temperature of PLA, which is around 60 °C. Therefore, using a hairdryer for this purpose may not yield satisfactory results.
Surface Coating
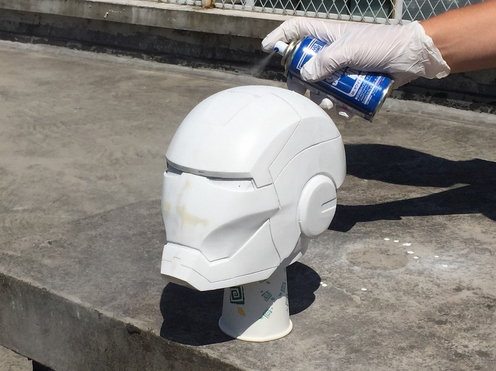
Adding an additional coat of material is indeed a great way to achieve a smooth surface on a 3D print. There are several options for this, including spraying, painting, or dipping the print.
One common method is to use a paint primer, which helps to create a smooth base for the final coat of paint. Applying a primer can fill in any defects, such as layer lines, and provide a consistent surface for painting.
Another option is to use an epoxy coating. Epoxy resin can be applied to the print, filling in any imperfections and creating a glossy and smooth finish. This method not only improves the appearance of the print but also provides added durability and protection.
Both paint primers and epoxy coatings can be applied with brushes, spray guns, or by dipping the print into the material, depending on the desired finish and the specific product being used.
Remember to follow the manufacturer’s instructions and safety guidelines when using these coatings, and ensure proper ventilation and protective equipment are used when working with chemicals.
Primer
Using a primer on a print is indeed often combined with sanding to achieve a smooth surface. The purpose of using a primer is to fill in the layer lines and create a smoother surface for finishing. After applying the primer, it needs to dry, and then the top layer can be sanded down.
Sanding the primer is typically easier than sanding the actual PLA material because the primer is softer and more forgiving. By sanding the primed surface, you can further refine the smoothness and remove any remaining imperfections.
Using primer can result in a visually improved print compared to just sanding alone. The primer helps to create a more uniform surface, hiding the layer lines and providing a better base for further finishing steps.
It’s important to note that using primer and sanding can be time-consuming, as you’ll need to wait for each layer of primer to dry and then perform the sanding process. Additionally, it is recommended to follow up a primed print with paint or another protective coating, as primer alone may not provide long-term durability if left uncovered.
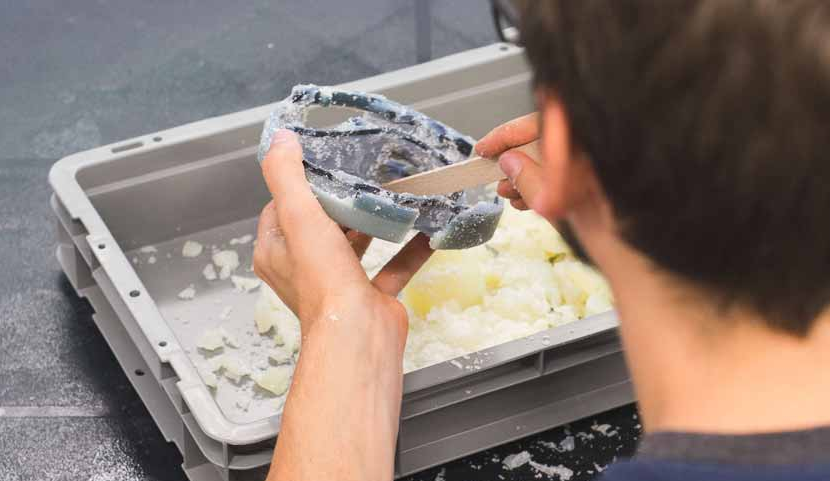
Epoxy

Epoxy can be used as a resin coating to achieve a smooth finish on 3D prints. Similar to primer, epoxy fills in imperfections and layer lines on the surface of the print. However, epoxy is particularly effective at filling larger holes or artifacts left behind by the printing process.
Using epoxy to finish your print involves mixing the epoxy resin according to the manufacturer’s instructions. Once mixed, the resin is applied to all surfaces of the print using a paintbrush. It’s important to ensure that the epoxy coats are applied evenly to avoid variations in thickness on the finished print.
Working with epoxy can be a bit more challenging compared to using primer, as it requires proper mixing and careful application. However, it offers the advantage of effectively filling larger imperfections and providing a smoother overall surface.
After applying the epoxy, it needs to cure according to the instructions provided. Once cured, you can further refine the surface by sanding if desired. Additionally, applying a protective topcoat or clear sealant over the epoxy can enhance the durability and longevity of the finish.


