Support removal is an essential part of the 3D printing process, although it can be a bit of a hassle. Supports are necessary for printing models with overhanging or unsupported areas. Without supports, these parts would be printed on thin air and likely result in failed prints.
Supports are typically required for areas like outstretched limbs on figurines or middle sections of bridge-like structures. These are sections that extend beyond the borders of previous layers and need additional support until they become self-supporting. Both FDM (filament-based) and resin-based prints require supports, although their support needs may differ slightly.
Removing supports is a post-processing step that can usually be done relatively easily. However, we’ve all encountered situations where the supports are fused too strongly, making their removal without damaging the model a challenging task.
In this article, we will explore the challenges posed by hard-to-remove supports in both FDM and resin prints. We’ll discuss prevention strategies and provide tips on minimizing damage while removing stubborn supports.
To begin, let’s delve into how support removal can vary depending on the type of material you are printing with.
Printing Materials

The materials used in 3D printing and the amount of supports required can vary depending on the specific object being printed and its intended purpose. For example, a character or figurine model may not require a high level of strength, making PLA filament a suitable choice. However, such a model may have intricate details and complex geometry that necessitate a higher density of supports.
It is important to consider the support requirements and the material chosen before starting a print. If a model requires dense supports, it may be necessary to reconsider using certain materials, such as carbon fiber filament. While carbon fiber filament offers strength and durability, it can also make support removal more challenging due to its rigidity and potential for damage to the model during support removal.
By carefully considering the support needs and selecting an appropriate material, you can optimize the print quality and ease of support removal for your 3D models.
FDM
- PLA: The most commonly used filament, PLA is relatively brittle. While that may limit its uses, it makes supports easy to snap right off.
- ABS: For more hard-wearing prints with heat and chemical resistance, ABS is a great option. Although, as ABS can withstand more stress, supports can be more challenging to remove if the settings are not properly dialed in.
- PETG: Easy to print like PLA and strong like ABS, PETG is the go-to for functional prints. However, PETG likes to stick to itself, which makes it extra important to pay attention to the support settings when working with this filament.
- TPU & TPE: As the softest filaments in this list, TPU and TPE supports won’t snap off like you may be used to. In fact, these materials bond to themselves very well, so cutting off supports is a common removal method. The challenge comes when you need to cut off supports in hard-to-reach places.
- To minimize the need for supports and simplify support removal in FDM printing, consider the following tips:
To minimize the need for supports and simplify support removal in FDM printing, consider the following tips:
- Calibrate your printer: Perform calibration prints to understand your printer’s capabilities for overhangs and bridges. This knowledge will help you design models that require fewer supports or can be split into multiple parts to eliminate the need for supports.
- Infill density: Set the infill density for supports to be lower than that of the model. Start with a recommended density of around 10%, but for steep overhangs closer to 90 degrees, consider increasing it to 15% for better support.
- Touching Buildplate: Choose support settings that only touch the build plate, avoiding supports that originate from the model itself. Utilize features like Tree supports in slicing software such as Cura or PrusaSlicer, which automatically generate supports that touch the build plate and help reduce the number of supports required.
- Support distance: Adjust the “Support Z distance” (Cura) or “Top contact Z distance” (PrusaSlicer) to create a small gap between the top layer of the support and the bottom layer of the part it supports. Increasing this distance, typically aligned with the layer height, makes support removal easier.
Manual Remove
In FDM printing, supports are generally not as strongly fused to the model compared to resin prints. This means that in some cases, you may be able to remove supports by hand. However, for most support removals, you’ll need two main tools, along with other options you can consider depending on the specific case:
If you’re having trouble accessing or removing difficult supports, a craft knife can be used to cut away a section of the supports, providing better access for removal. Carefully cut along the surface or edges close to the model to remove smaller pieces of support and minimize the need for extensive sanding. Take your time and proceed with caution to avoid cutting into the model or injuring yourself. Alternatively, a small metal spatula without a sharp edge can help in tight spots or lifting support walls. Use these tools slowly and carefully for effective support removal.
Flash cutters are essential tools for support removal in 3D printing. They allow you to easily remove the bulk of the supports, including hard-to-reach areas and support-filled cavities. Additionally, you can use the cutters to trim or cut back stubborn supports that are challenging to remove by hand and may pose a risk to your model. Once you have removed the majority of the supports, use the cutters to trim the remaining edges close to the model surface, making post-processing tasks easier. Flash cutters are versatile and effective tools that greatly simplify support removal and contribute to achieving a clean and finished print.
- Tweezers: Potentially in combination with a knife or cutters, tweezers are great at getting tiny supports out of crevices.
- Files: These may be useful to remove the last stubborn bits of support in hard-to-reach places and thin holes, such as those for fan housing.
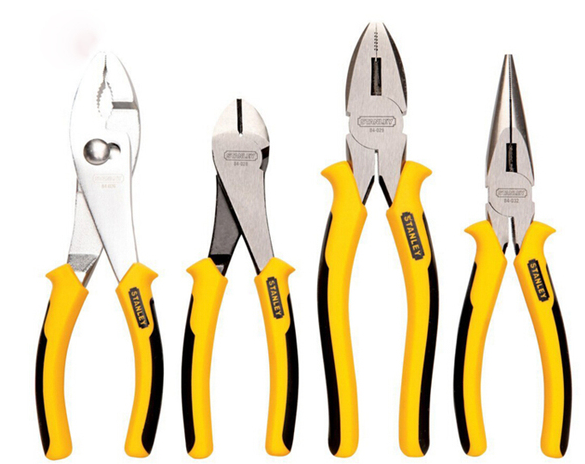
- Pliers: If you need a longer reach or more of a grip, pliers are a nice alternative to cutters for bulk support removal.
Mechanical Remove
When resorting to alternative methods for support removal, it’s essential to prioritize safety. Take proper precautions, such as wearing cut-proof gloves and goggles to protect yourself. Additionally, ensure that electrical cables are intact and do not pose any trip hazards. By following these safety measures, you can safely handle tools and navigate support removal challenges.
Using mechanical tools is best suited for large, simple models where you don’t have to worry about accidentally cutting off some detail. There are a few options you can use, but keep in mind that smaller tools provide more control over support removal. Let’s look at the possible options.
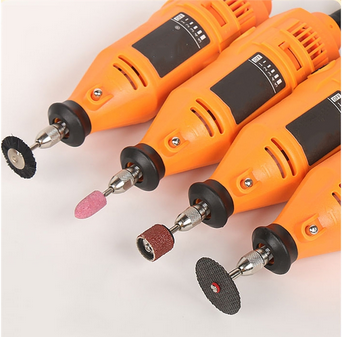
Mini Rotary Tool
Highlighting the “mini” aspect, handheld rotary tools are equipped with various attachments that greatly facilitate support removal. Saw-like attachments effortlessly detach support structures along the model’s surface in a single sweep. Sanding heads prove invaluable for carefully eradicating structures too close to the surface for safe removal by other means. Proceed cautiously, taking your time and removing supports in layers whenever possible.
Soldering Iron
A soldering iron can be utilized to heat the blade of an X-acto knife, enabling smooth cutting through plastic with ease. However, caution must be exercised to avoid directly touching the model’s surface, as it may result in unwanted marks.
Another technique involves running the shaft of the soldering iron (not the tip, as it is too hot) along the edges of the print to smoothen the rough marks left by supports. It is essential to experiment with this method beforehand to ensure its suitability for critical areas of your print.


